Customer Groups - Restricting Products & Categories
Restricting Access to Products & Categories
Through the use of Customer Groups "Restricting Products" Tab in your stores admin you can restrict access to only allow a Group to have access to certain Products and Categories.
Here are two examples of how Restricting Access to Products & Categories can work:
- You have a contract to sell only certain products at a set price to a local Hospital. You can restrict customers logged in and a member of this group to only see these products you have selected and set there price for.
- A local School wants to do a fundraiser and you setup a Group for them that they can share with the school. They only want to offer Office and School Supplies no other Categories on your site. These tools will allow you to offer that as well.
- Go to Customers --> Customer Groups
- Click "View" next to the "Customer Group" you want to add Restrictions to.
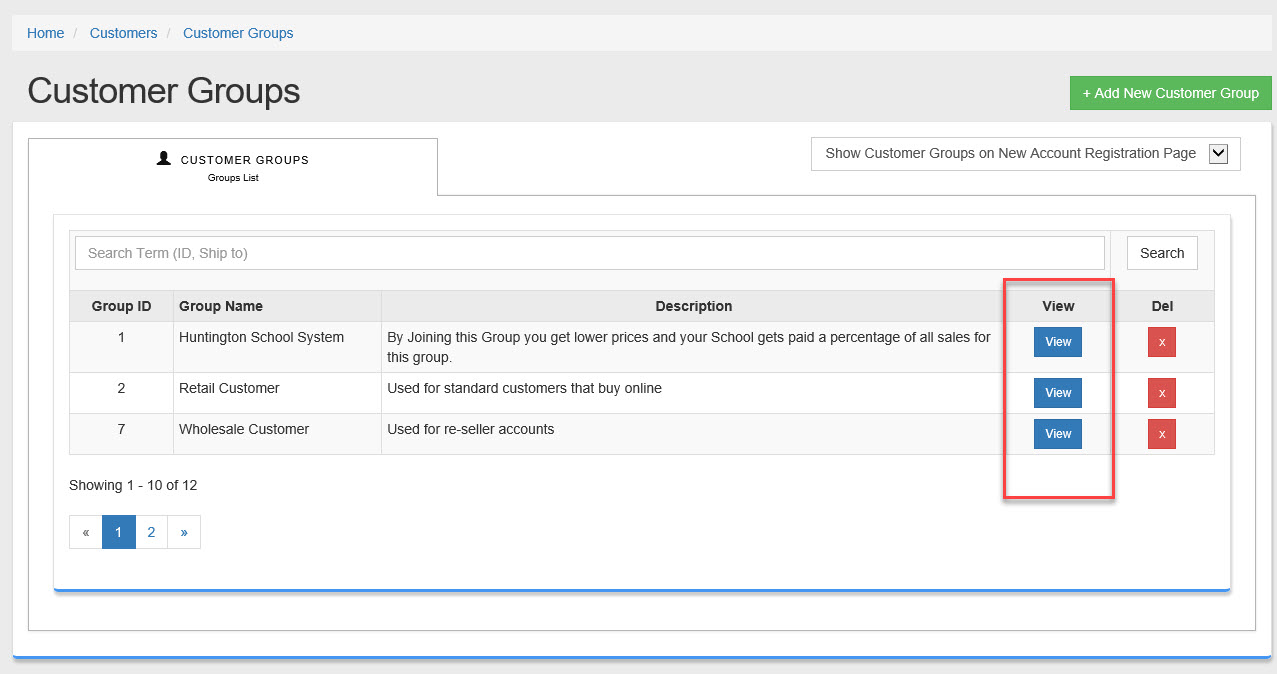
- Click on the "Restrict Products" Tab.
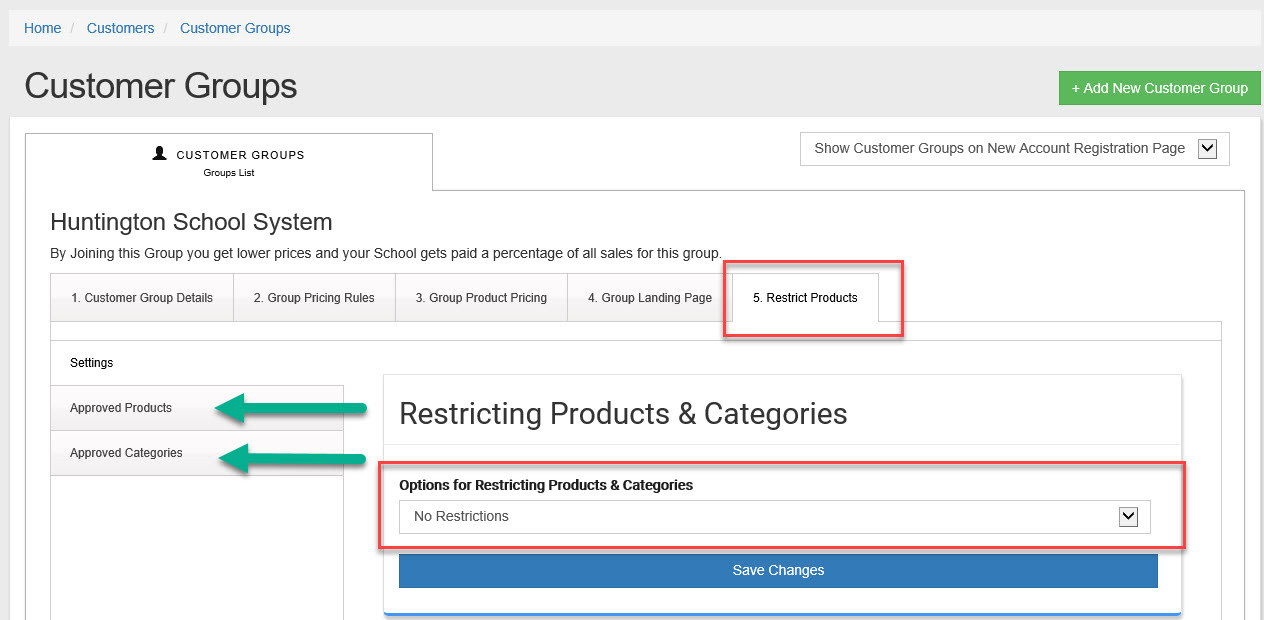
- First lets set the type if Options for Restricting Products & Categories
- "No Restrictions" This is the default setting. This setting will give access to your full product line and Categories."No Restrictions" This is the default setting. This setting will give access to your full product line and Categories.
- "Restricting to Approved Products" : By selecting this option only Approved products can be viewed or bought by members of this Group.
- Restricting to Approved Categories Plus Approved Products" This selection will allow both Approved products and Approved Categories.
- To Setup Approved Products click on the Tab "Approved Products"
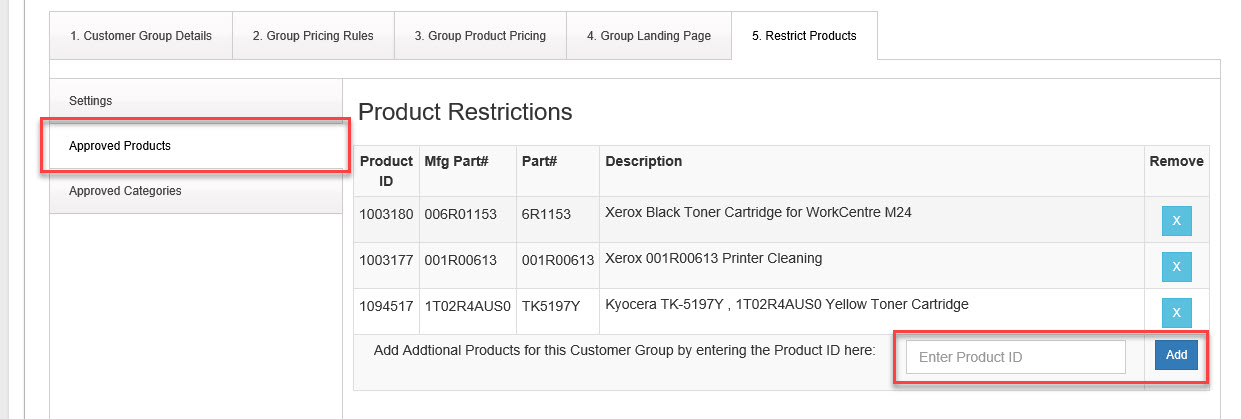
- To Add an Approved Product enter the Product ID in the box and click Add. You must know the ID of the product. To get the Product ID search for the product on your web site and get the ID from the URL or search in your stores admin under products.
- Once the product is added its now an Approved Product.
- To remove an Approved Product from the list click on the "X" and the product will be removed.
- To Setup Approved Categories click on the Tab "Approved Categories"
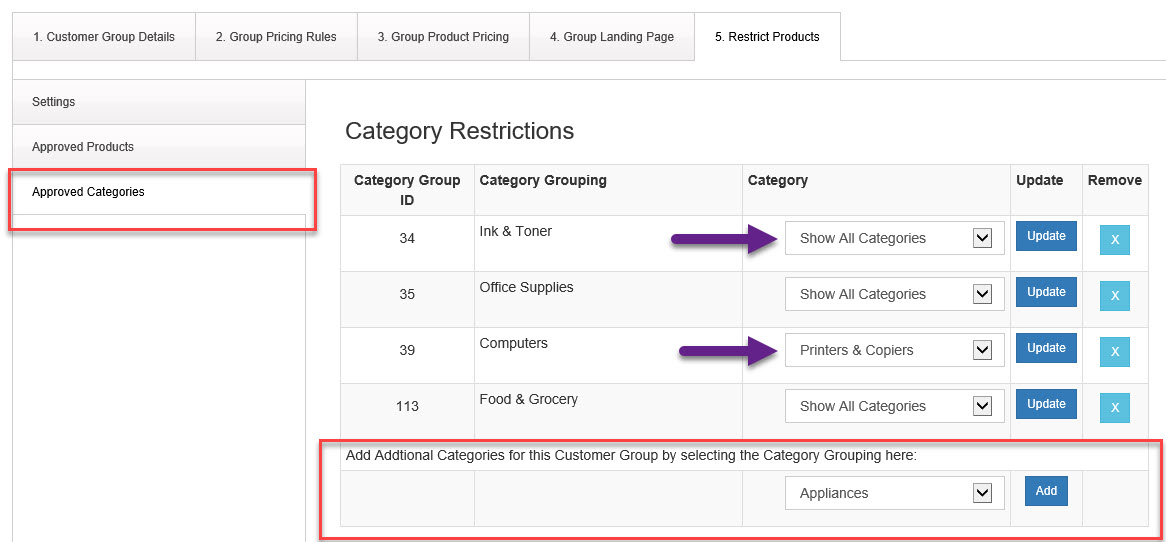
- To add an Approved Category to this Group select the Category name from the drop down menu then click Add. This Customer Group will have access these Categories only or/and Products based on your Group Settings.
- After you select the Grouping Category and click "Add" now you can add a top level Category available to this to this Grouping Category (no Sub-Categories can be selected). Use 'Show All Categories' to allow access to all Categories under this Category Grouping.
- Once the Category is added its now an Approved Category for this "Customer Group".
- To remove an Approved Category from the list click on the "X" next to the Category you want to remove.