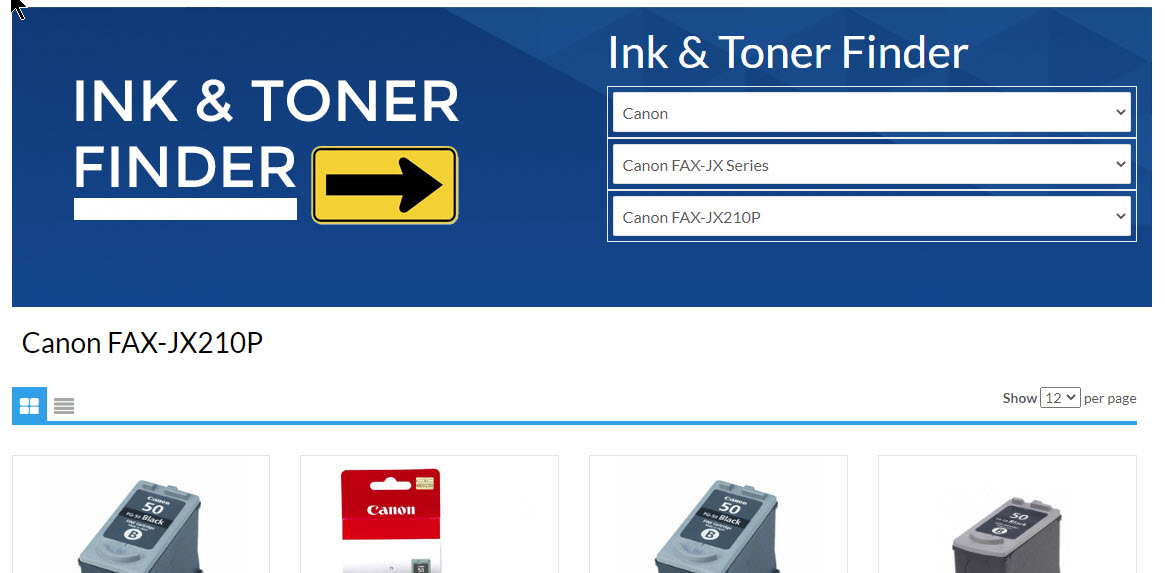
Product Finders (i.e. Ink & Toner Finder)
Adding an Ink & Toner finder, Office Products Finder, Grocery Finder or any other Category you would like to offer a product finder for your customers.

Where can it be added:
- Home Page only in all the HTML editors (Top, Center, Bottom)
How to add it to the home page:
At the bottom of this help page is the code to insert in to the "Home Page Content/HTML". Below you will find where and how to properly add the code. The code is designed to be edited by you or someone that understands CSS scripting in order to customize it to your linking. Add any images you use to you banner's folder in the Banner/Image manager under settings.
- From your Admin go to the left menu "Settings"
- Click on "Store Design"
- Now select "Home Page Content/HTML"
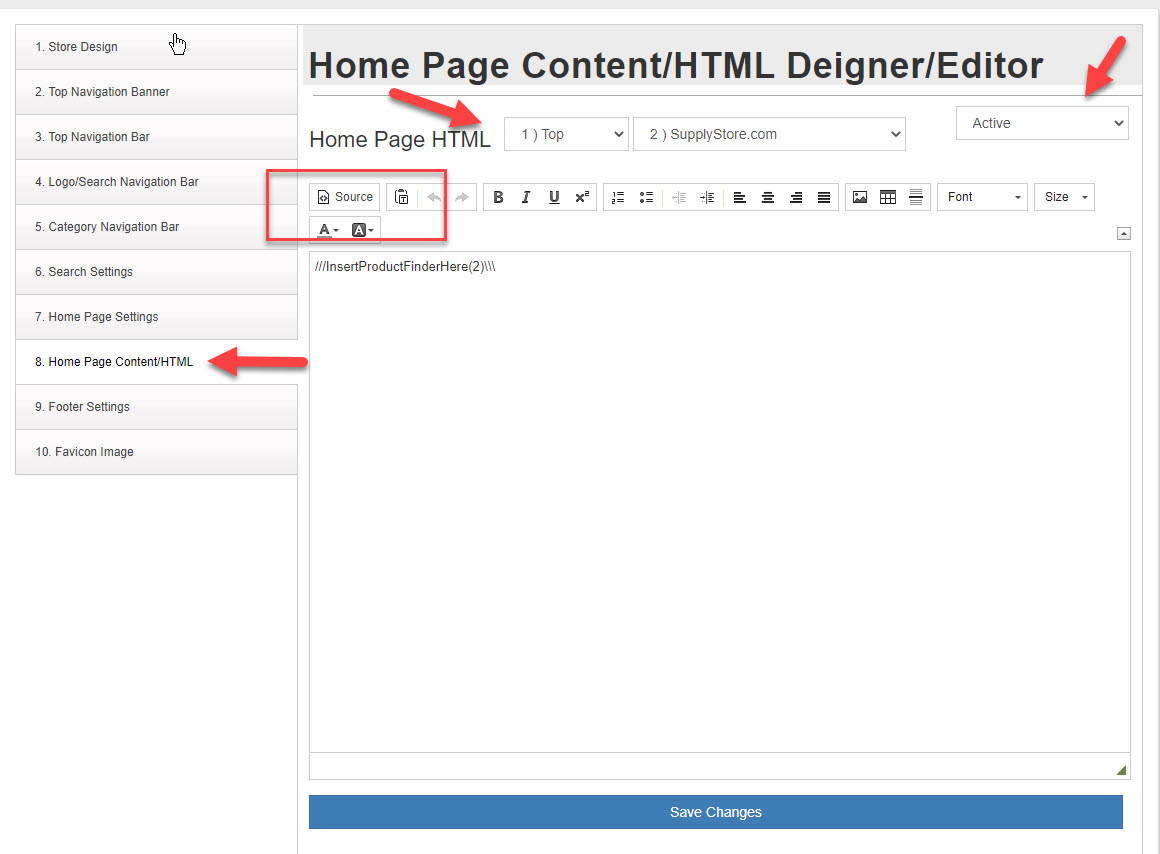
- IMPORTANT : Clink on the "Source" icon as shown in the red box in the image above.
- Copy ONLY one of the samples below between the lines "----Begin Here but do NOT copy this line---" and "----END Here but do NOT copy this line---"
- Now paste that code in the the Home Page editor and click save changes. Once saved you will only see "///InsertProductFinderHere(x)\\\\\\" not the CSS part of the code to view and edit that click on the "Source" icon again make your changes and click save. Each time you click save changes it will revert to not seeing the SCC code but its there you will just need to click the "Source" icon again.
- Add the ID of the Category you what to use in the finder replacing the 2 in the code samples below : ///InsertProductFinderHere(2)\\\\\\
- Go to your home page and look at the changes you have made.
Code Samples:
Code Sample #1
----Begin Here but do NOT copy this line---
<style type="text/css">
@media only screen and (max-width: 800px) {
.col-sm-0 {
display: none;
}
}
#productfindercss {
background-color: #ffffff;
Border:7px Solid #4787A4;
Border-radius: 10px;
}
#productfindercsstdLeft {
background-image: url("https://img.powerecommerce.com/pec/7/Finder_1.jpg");
background-repeat: no-repeat;
background-color: #ffffff;
min-Height:230px;
}
#productfindercsstdright {
background-color: #ffffff;
min-Height:230px;
}
#productfindercsstdtitlediv {
}
#productfindercsstdtitleh1 {
</style>
///InsertProductFinderHere(2)\\\\\\
----END Here but do NOT copy this line---
Code Sample #2

----Begin Here but do NOT copy this line---
<style type="text/css">@media only screen and (max-width: 800px) {
.col-sm-0 {
display: none;
}
}
#productfindercss {
background-image: url("https://img.powerecommerce.com/PEC/7/ink_toner_6.jpg");
background-repeat: no-repeat;
min-height: 300px;
}
#productfindercsstdLeft {
}
#productfindercsstdright {
}
#productfindercsstdtitlediv {
}
#productfindercsstdtitleh1 {
color:White;
font-size:45px;
}
</style>
///InsertProductFinderHere(2)\\\\\\
----END Here but do NOT copy this line---
After Last section in the finder is made products for that category of products will display below the finder, pushing the content that was there farther down the page in order to make room for the products.