Getting Started with Customer Groups
You can create different "Customer Groups" for your store. These "Customer Groups" are designed to group customers in to like categories for marketing, retail vs wholesale, school programs, buying groups and so on.
Customer Groups Features:
- Unique Landing Page
- Assigned Pricing Level
- >Group Pricing Rules
- Custom Pricing for given Product or Products
- Assigned Shipping Level
- Restricting Products
- Restricting Categories
These "Customer Groups" can have be assigned a Pricing Level, Group Pricing Rules, Custom Pricing for given Product or Products. This is can be a different pricing structure to your customers based on which customer group they belong to. A common example of customer groups is a retail/wholesale type of set up, where regular customers are able to purchase your products at the regular price, but special customers are able to purchase your products at wholesale prices, provided they belong to that special pricing group. Also Setting up fund raiser Group for a School or Church allowing you to track how many sales came from that Group. Use these groups in Email Marketing campaigns to target Coupons or Specials to a given customer group.
Getting Started with Customer Groups
Add a New Customer Group:
Log into your Admin and, using the left hand navigation menu:
- Go to Customers -> Customer Groups
- Click on "+Add New Customer Group" at the top right of the page.
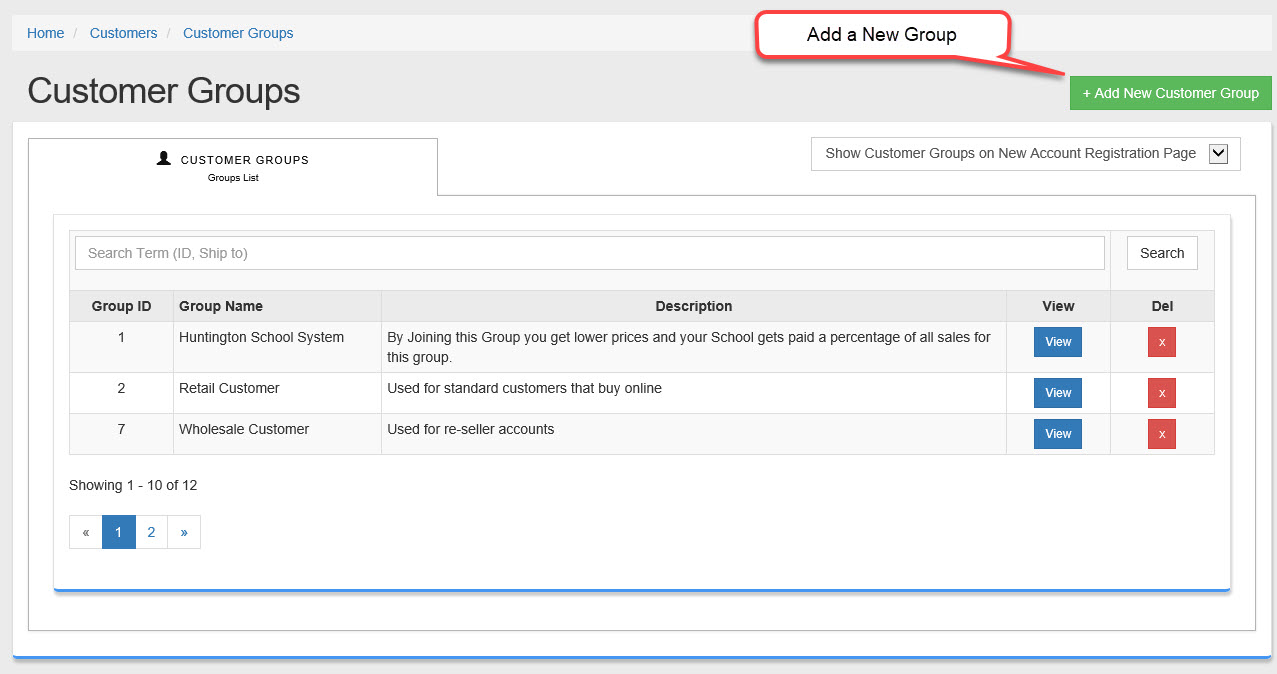
- After Clicking "Add New Customer Group" or Click on "View" of an existing Group you will see a screen like this:
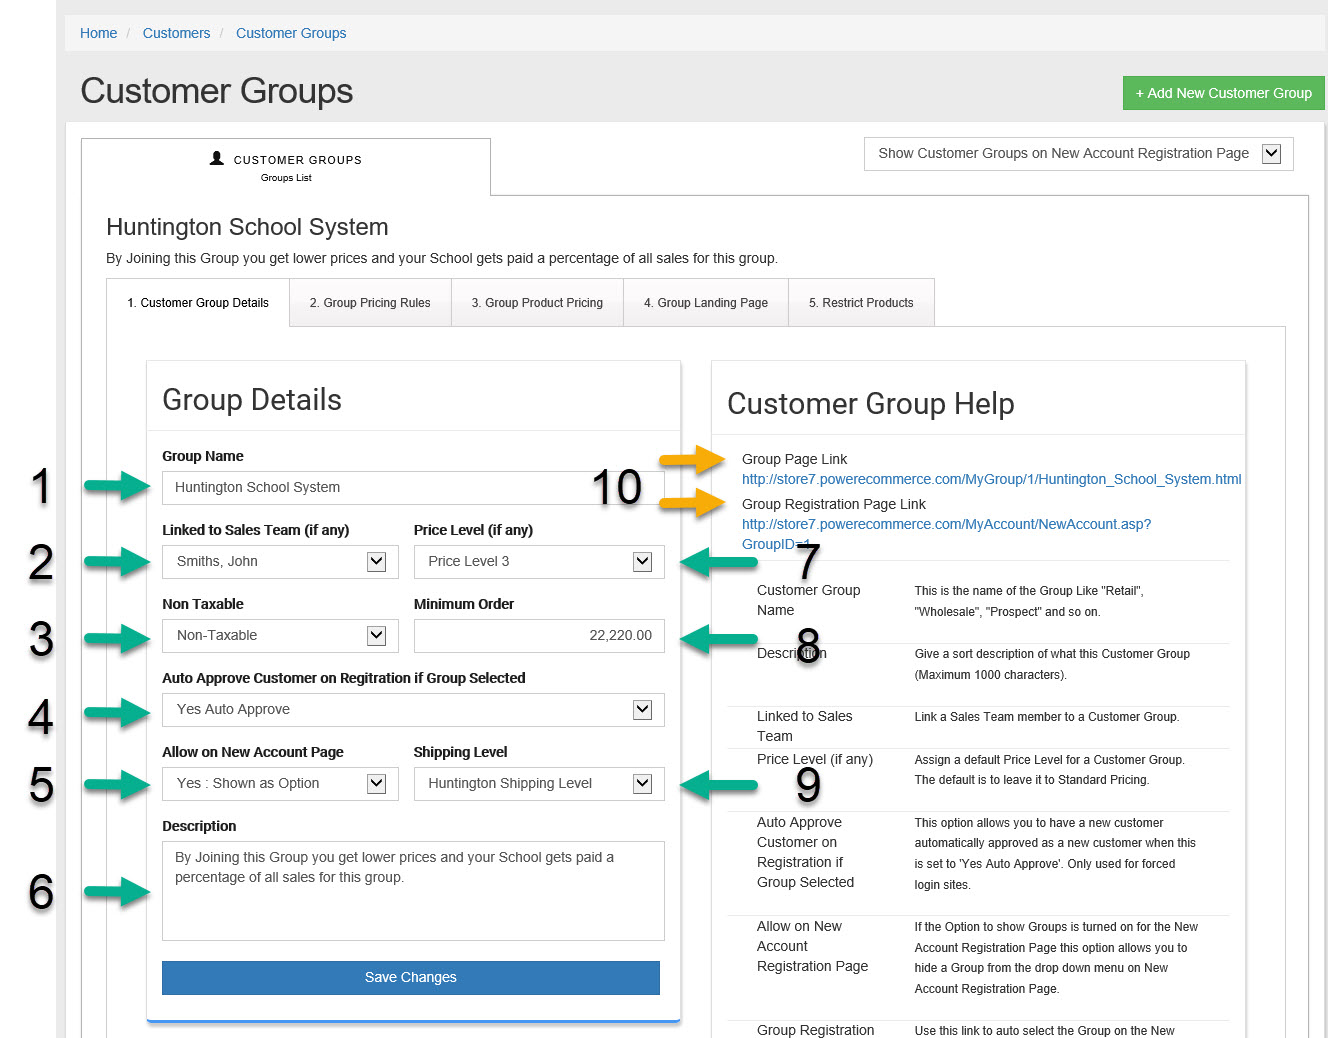
- Customer Group Name
This is the name of the Group Like "Retail", "Wholesale", "My Local School" and so on. This name will be seen by your customers. Do not use special characters like quotes, commas, exclamation points, periods, hash tax(#) and so on. - Linked to Sales Team (if any)
If you wish link this "Customer Group" to a "Sales Team" member.
Use this setting to make the customer group non-taxable and waive any tax charges on the group's order.- Auto Approve Customer on Registration if Group Selected
This option allows you to have a new customer automatically approved as a new customer when this is set to 'Yes Auto Approve'. Only used for forced login sites. - Allow on New Account Page
If the Option to show Groups is turned on for the New Account Registration Page this option allows you to hide a Group from the drop down menu on New Account Registration Page. - Description
Next enter a Description of this group (Maximum 1000 characters). Customers will be able to see this description on both the Landing Page and the direct link to the new account page (see # 10). - Price Level (if any)
Assign a default Price Level for a Customer Group. The default is to leave it to Standard Pricing. To Edit these price levels see the articles "How do I set up pricing levels?" in the Help Desk. - Minimum Order
Here you will specify a minimum order amount customers must have in their cart before they are able to take advantage of the pricing level. For example in the case of a wholesale pricing group, you may want to dictate that the customers must order a minimum amount of $100 in order to qualify their purchases at the wholesale price level. - Use this option to give a Group a Per-Defined Shipping level or level to Standard. A Standard setting will give the same shipping rates and options as your standard non-Grouped Customers. Manage your shipping levels under Settings -> Shipping.
- Group Page Link & Group Registration Page Link
Group Page Link : Can be used for marketing to potential customers of this group. By sending visitors directly to this link they will see the landing page for this Group with any content you have added to the page (see Group Landing Page in the help desk). If a customer registers for a new account by going to this page they will automatically be assigned to the Customer Group.
Group Registration Page Link : This is a direct link to the registration page and it will automatically know to assign this registration to this group.