Adding Google Verification to your site.
|
How do I verify my site with Google Webmaster Tools?
|
|
|
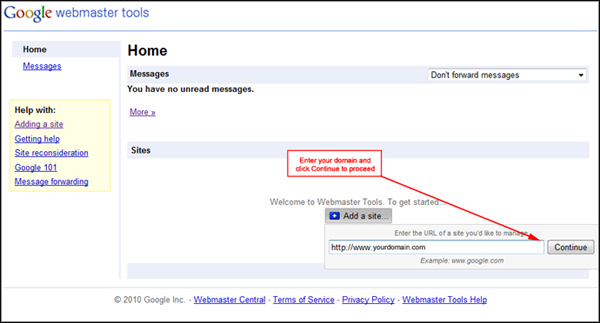
One of the most powerful tools a website owner has at their disposal is Google WebMaster Tools. This is a free service that Google offers to help domain owners optimize their sites for search engine rankings as well as detecting issues and unknown errors that may be present on the site.
When you add your domain to Google Webmaster Tools, Google first needs to verify you as the domain owner. This is to ensure they are giving you analytical information properly for your proper domain. This article will assist you with verifying your site with Google. Google Webmaster Tools
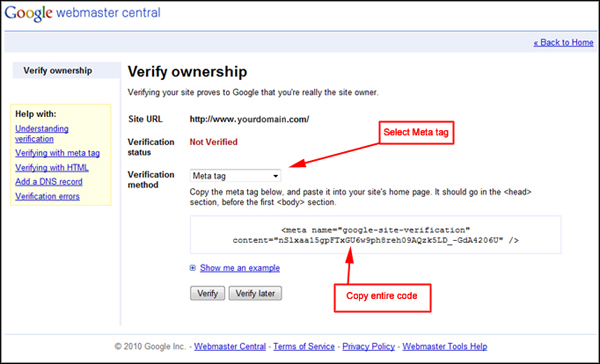
You will now be taken to the "Verify Your Site" page. This is where you will be able to select the verification method to use. Google gives you three options, but the most common is Meta tag - which we will be concentrating on here. With the Meta tag method, Google will provide you with a code that will need to be placed on your site's main header. When you verify the site with Google, they will look at the site and reference this specific coding to complete the process.
Adding the code to your Power-eCommerce storeNow perform the following:
|