QBMS/Quickbooks Payment Gateway setup
QBMS/Quickbooks Payment Gateway setup:
QBMS Setup:
Once you have your QBMS/Quickbooks Merchant account you need a "API Enabled" user name and password. If you were emailed this, the email will have text simular to this:
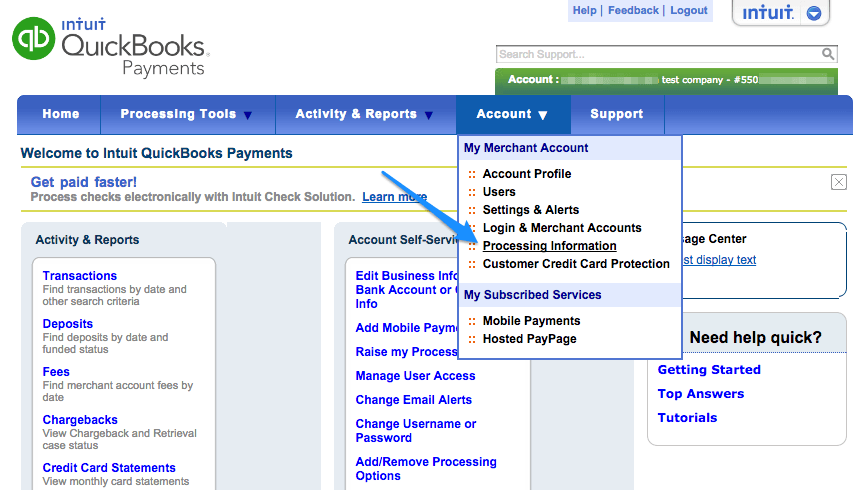
You must have a valid payments account in order to generate a connection ticket. Please note that, while logged into your Intuit merchant account, you must select the blue Account tab, and click Processing Information from the drop-down menu:
Make sure Process with Web Store is turned ON.
If this is already done, log into your account using your Intuit QBMS credentials, then visit the link on the plugin “Settings” page (this process will be the same for both production and test credentials). It’s important that you’re already logged into your merchant account.
For production credentials, you can also copy and paste this link:
https://merchantaccount.quickbooks.com/j/sdkconnection?appid=826867585&sessionEnabled=false
For test credentials, you can instead copy and paste this link:
https://merchantaccount.ptc.quickbooks.com/j/sdkconnection?appid=1013327659&sessionEnabled=false
Please note that these links work with the default Application ID / Login credentials. If you’ve created your own app, please continue following the links in our walkthrough for the appropriate URLs.
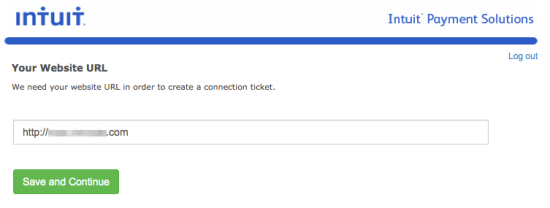
If you’ve never created a connection ticket before, you may need to enter the URL of your website.
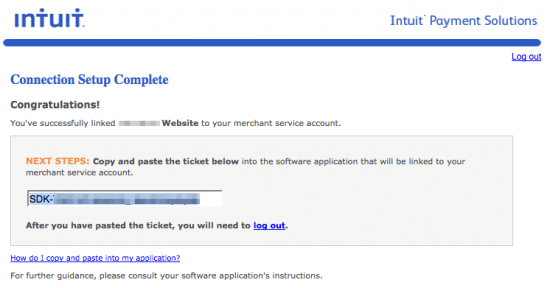
You’ll then get a connection ticket to copy and paste into the plugin settings.
If you have created a connection ticket before, you should see this:
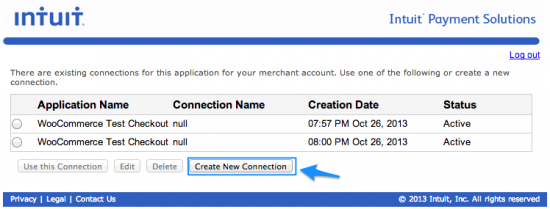
Create a New Connection Ticket
You’ll want to create a new connection ticket if you do not already have one saved to allow your merchant account to use this integration. Once you’ve clicked “Create New Connection” or clicked on the previously saved connection, you’ll see this:
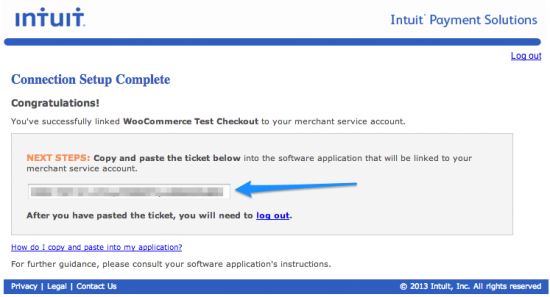
Grab the Connection Ticket
Copy this connection ticket, and log back into your store (see more on this below).

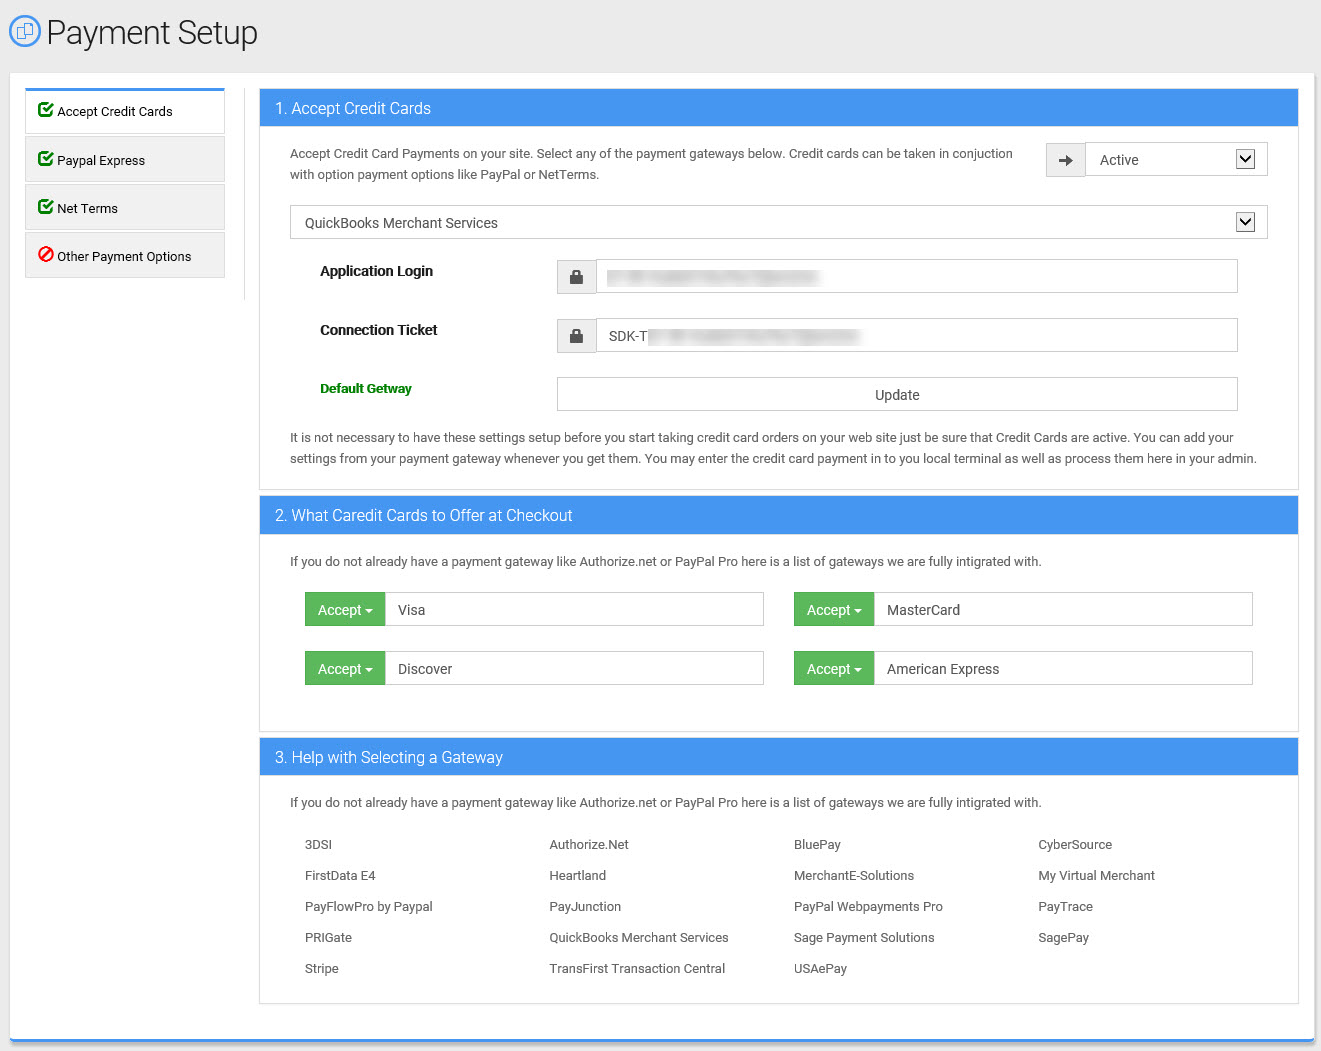
Enter Your QBMS Application Login & Connection Ticket to your Admin:
From your Power-eCommerce Admin follow the steps below.
- Go to Settings -> Payment Setup
- In 1. "Accept Credit Cards" section, select your Gateway.
- Select "QuickBooks Merchant Services" in the drop down menu.
- Add your credentials for your selected Gateway.
- Click the “Update” button to save your changes.
- Be sure that you have also set "Accept Credit Cards" to “Active” it is was not already.
- Last Select the types of credit cards you want to accept in section 2." What Credit Cards to Offer at Checkout” (Visa, MasterCard, Discover, American Express)
After the Payment Gateway is setup, customers can now use their credit card to checkout.